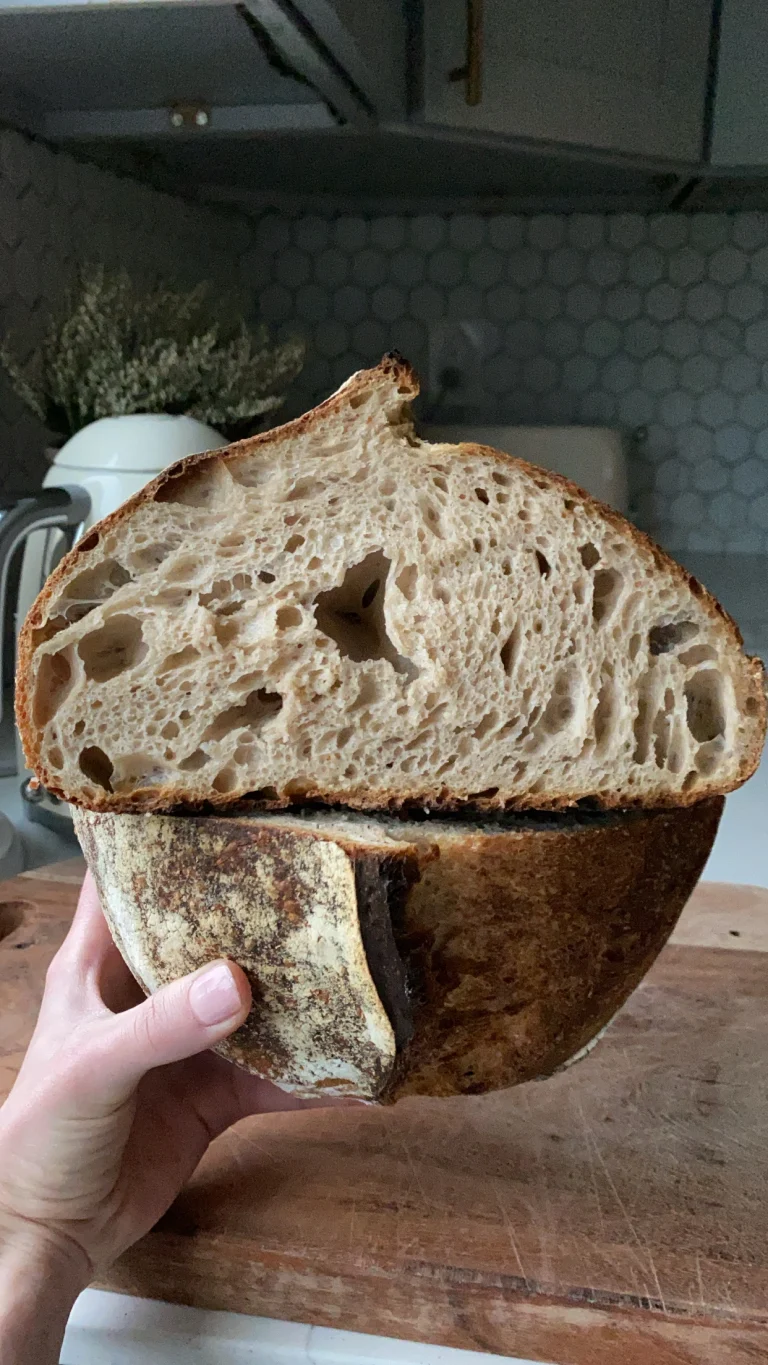
I figured the first recipe I share on here should be the one that matters the most to me – Sourdough Bread.
I’ve made dozens if not over a hundred loaves to date and have tried many different recipes. Some were utter failures and some were true triumphs. Sourdough is a learning process! I have combined tips I learned from various recipes and videos to come up with the version I’ll be sharing today. Compared to other recipes I’ve tried, this is a pretty simplified version that still requires you to be hands on but overall the method is easy to follow and yields a beautiful loaf every time.
The best part of this recipe is the versatility of it. You can interchange the types of flour you use + the amounts of each depending on what you have on hand, and you can easily adjust the hydration of the dough depending on what you’re comfortable with.
One thing I recommend is reading the entire post before starting your bread so you have a good understanding of what’s to come. If you have any questions please feel free to leave them in the comments and I’d love to offer help and advice!
Let’s be real, no one comes to blogs for the blah-blah-blah’s before the recipes so let’s get into my Simple Sourdough Recipe. Buckle up, there’s a lot of information.
Ingredients:
- 1000 Grams Total of Flour*
- 735-800 Grams Lukewarm Water**
- 20 Grams Salt
- 200 Grams Riper Sourdough Starter (at its peak)
Directions:
Making the Dough:
- In a large bowl, combine your flours together by hand. It’s really important to do things with your hands when it come to bread because you learn to measure the progression of the dough by the feel of it.
- In a medium sized bowl, mix together the water and the sourdough starter until the liquid becomes murky and cloudy in appearance.
- Pour the liquid mixture into the flour and combine, once again with your hands, until no dry chunks of flour remain.
- Cover the dough with a tea towel and leave on the counter for 1-1.5 hours. This is the autolyse stage, where the dough will begin developing gluten strength.
- Once autolyse is done, uncover + sprinkle the salt over the top of the dough. Wet your hands generously and pinch the salt into the dough. Continue to do so until the salt is mixed throughout the dough.
- Spend the next 3-5 minutes mixing the dough. Stretch and fold it by lifting one side and bringing it over to the middle, repeating on all sides of the dough. Continue to make your way around the dough with stretch and folds to once again encourage the gluten development and help the dough build strength.
- Cover the dough with a tea towel and let it rest for 1 hour. This the beginning of bulk fermentation, where the dough will develop gasses and air pockets and the gluten development will continue strengthen.
- After 1 hour, perform your first set of coil folds. For a visual of this, feel free to reference the video below, as well as my social media platforms!
- Cover and repeat coil folds every hour for the next 3-6 hours, or until the dough is visibly larger in volume and bubbly. It should jiggle when you move the bowl around and will appear as if its been whipped. It will look ALIVE. For this step, go by the dough’s feel and appearance rather than by a timeframe as many factors can affect how long it will take.
Shaping:
Once the dough is bubbly and increased by about 50% in volume, meaning it’s 1.5x larger in volume than at the beginning, it’s ready to be shaped. Arguably, (or maybe not?) this is the best part.
- Dump the dough onto a wet countertop. Do NOT sprinkle any flour at this point. The dough will be sticky and without the water it WILL get stuck to the counter.
- Divide the dough in half using a bench-scraper. My favorite one is linked in my amazon storefront!
- Pre-shape each half by tucking the bench-scraper under the dough and pushing it away from yourself before pulling it back toward yourself. This builds tension and creates a round ball of dough. Videos of this can be found on my social media platforms.
- Allow the dough balls to rest on the counter uncovered for 15-20 minutes. They should slowly flatten and relax a bit.
- Now it’s time for the final shape. There are countless methods to do so and all yield great results. Choose the method you are comfortable with depending on your experience! Below is a description of my favorite way to shape dough. To better understand it, reference the video that follows.
– sprinkle the top of the dough with a pinch of flour, then flip the dough over so that the floured side is on the counter. Gently pull the sides of the dough to make into a rectangle, then fold the bottom of the dough upwards, about halfway. Fold over the left + right sides of the dough, then bring down the top into the middle of the dough. This is called a letter fold. Next, grab the upper corners of the dough and bring them down, pushing down to ensure they stick to the dough. Continue this down the sides of the dough log until you reach the bottom. Lastly, grab the top of the dough and fold it over towards the bottom and roll it up tightly. Use a bench scraper to roll the log and build tension in the dough. Pinch the edges to seal them, then transfer the dough to a floured banneton.
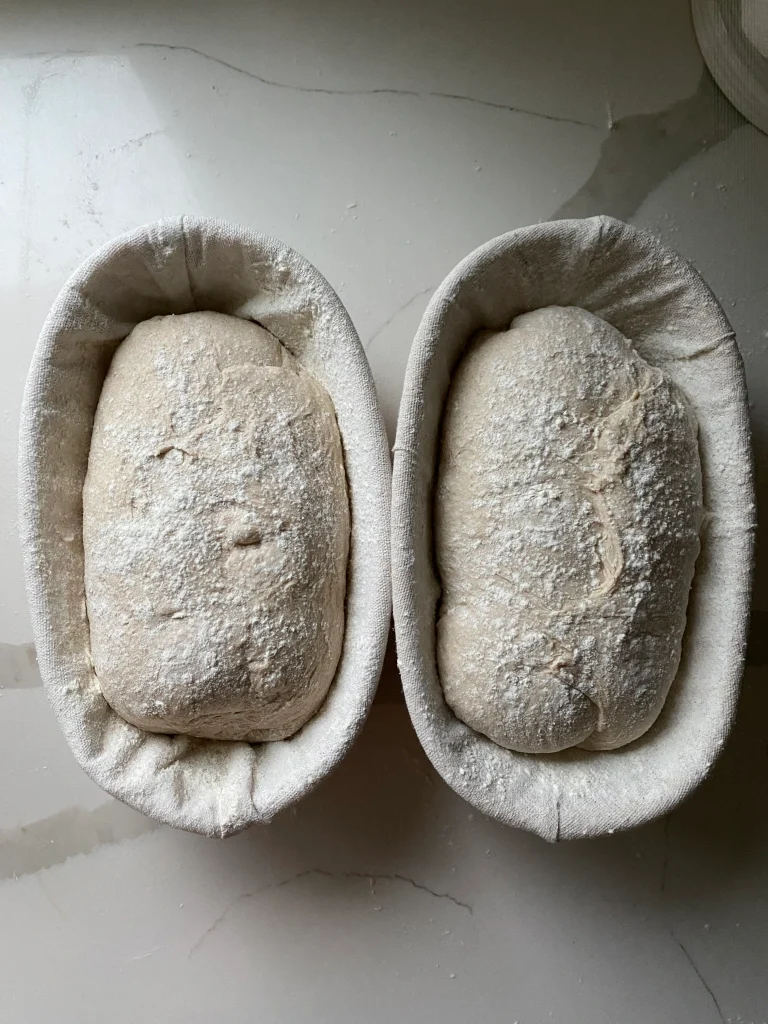
- Now that the dough is shaped and resting comfortably in its bannetons, sprinkle flour over the tops + loosely wrap each basket in plastic wrap.
- Poke Test: poke the dough with your index finger and watch for how quickly the dough springs back. If it’s quick and instant, leave the dough out on the counter for 45 minutes before performing the poke test again. To pass the poke test, the indent in the dough should stay for a few seconds before springing back very slowly. This can take as little as 30 minutes and as long as 2 hours, depending on the temperature of your home.
- Once the dough passes the poke test, it’s ready to be put in the refrigerator. Refrigerate for at least 12 hours, 14-18 hours is the sweet spot for perfectly sour bread. If you prefer a more mild taste, feel free to cold proof for 4-8 hours.


Baking:
Once your dough has proofed in the refrigerator overnight, it’s ready to be baked –
- Set the oven rack to the middle of the oven + place a dutch oven, with the lid on, onto the rack. Preheat the oven to 500 degrees Fahrenheit for at least 45 minutes and preferably 1 hour.
- Once the oven has preheated, remove your first loaf from the refrigerator. Place a sheet of parchment paper over the dough, then flip the banneton over so the bread is laying on the parchment paper. Slowly remove the banneton.
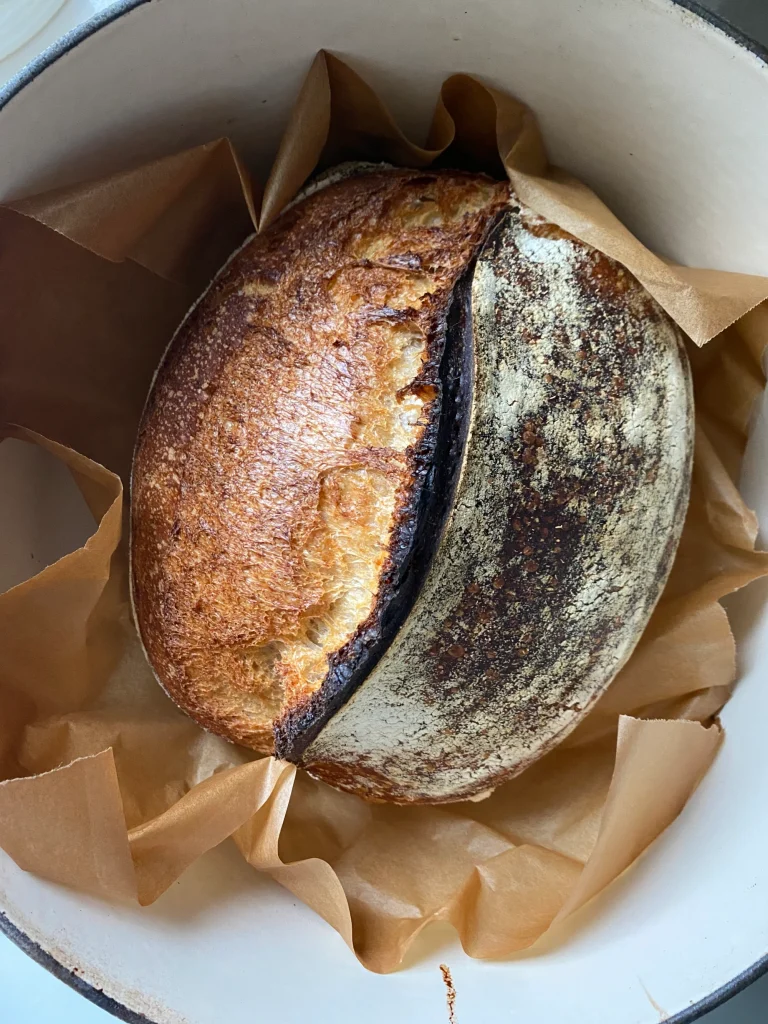
- Use a bread lame or sharp razor blade to score the dough. There are many methods to scoring and no way is wrong – as long as there is at least one long and 1/2 inch deep cut to allow air to escape.***
- Lift the dough by the parchment paper and gently drop it into the dutch oven. Cover with the lid and bake for 20 minutes.
- After 20 minutes, remove the lid and reduce the oven temperature to 450 degrees Fahrenheit. Bake the bread for another 25-30 minutes or until the crust is a deep and dark golden brown.
- To bake the second loaf, place the dutch oven back in the oven and turn the temperature back up to 500 degrees. Allow it re-heat for at least 15 minutes before repeating the process for the second loaf.
- Allow the loaves to fully cool, at least 3 hours, before slicing into them and devouring!
Notes:
*You will need 1000 grams of flour in total. I’d recommend at least 60% of the ratio to be a high protein bread flour (i.e King Arthur). You can also do a 100% bread flour dough for a white loaf with great results.
**The more water you add, the higher hydration the dough will have. High hydration doughs yield a softer crumb but are a more difficult + advanced dough to work with. They require more kneading and slap/folds to build up the gluten development. I would recommend starting with 735 grams if you are new to baking sourdough bread.
***The best tip for scoring bread is to have a very sharp razor and to be quick and confident in your motions. For a simple bakery style loaf score, simple cut down the middle of the dough. For the ever so beautiful bread “ear”, score with razor blade at an angle to the dough.


10 Responses
I love baking and I love your recipes
thanks so much! xx
What time do you recommend I start so I’m not up at night? I have to feed my starter about 5 hours before I begin.
Hi Marie! I’d recommend making an autolyse at a 1:4:4 ratio, meaning one part starter/4 parts flour/4 parts water. This levain typically takes about 10-12 hours to rise so you can make it the night before, and in the morning use it in your recipe! Hope that helps xx
With this 1-4-4 would it equal 200g in total?
Hi Kelly! If you mean the starter, yes you get about 200 grams!
Will have to give this a shot!
Hope you love it!
I may have missed this but how much starter?
Hi! 200g ripe starter at its peak 🙂 I’ve done it with a bit less than 200 and it was fine!